Permissions setup
This page shows how to grant a set of permissions to a user. It will cover the creation of a team and a role, plus the addition of a custom policy.
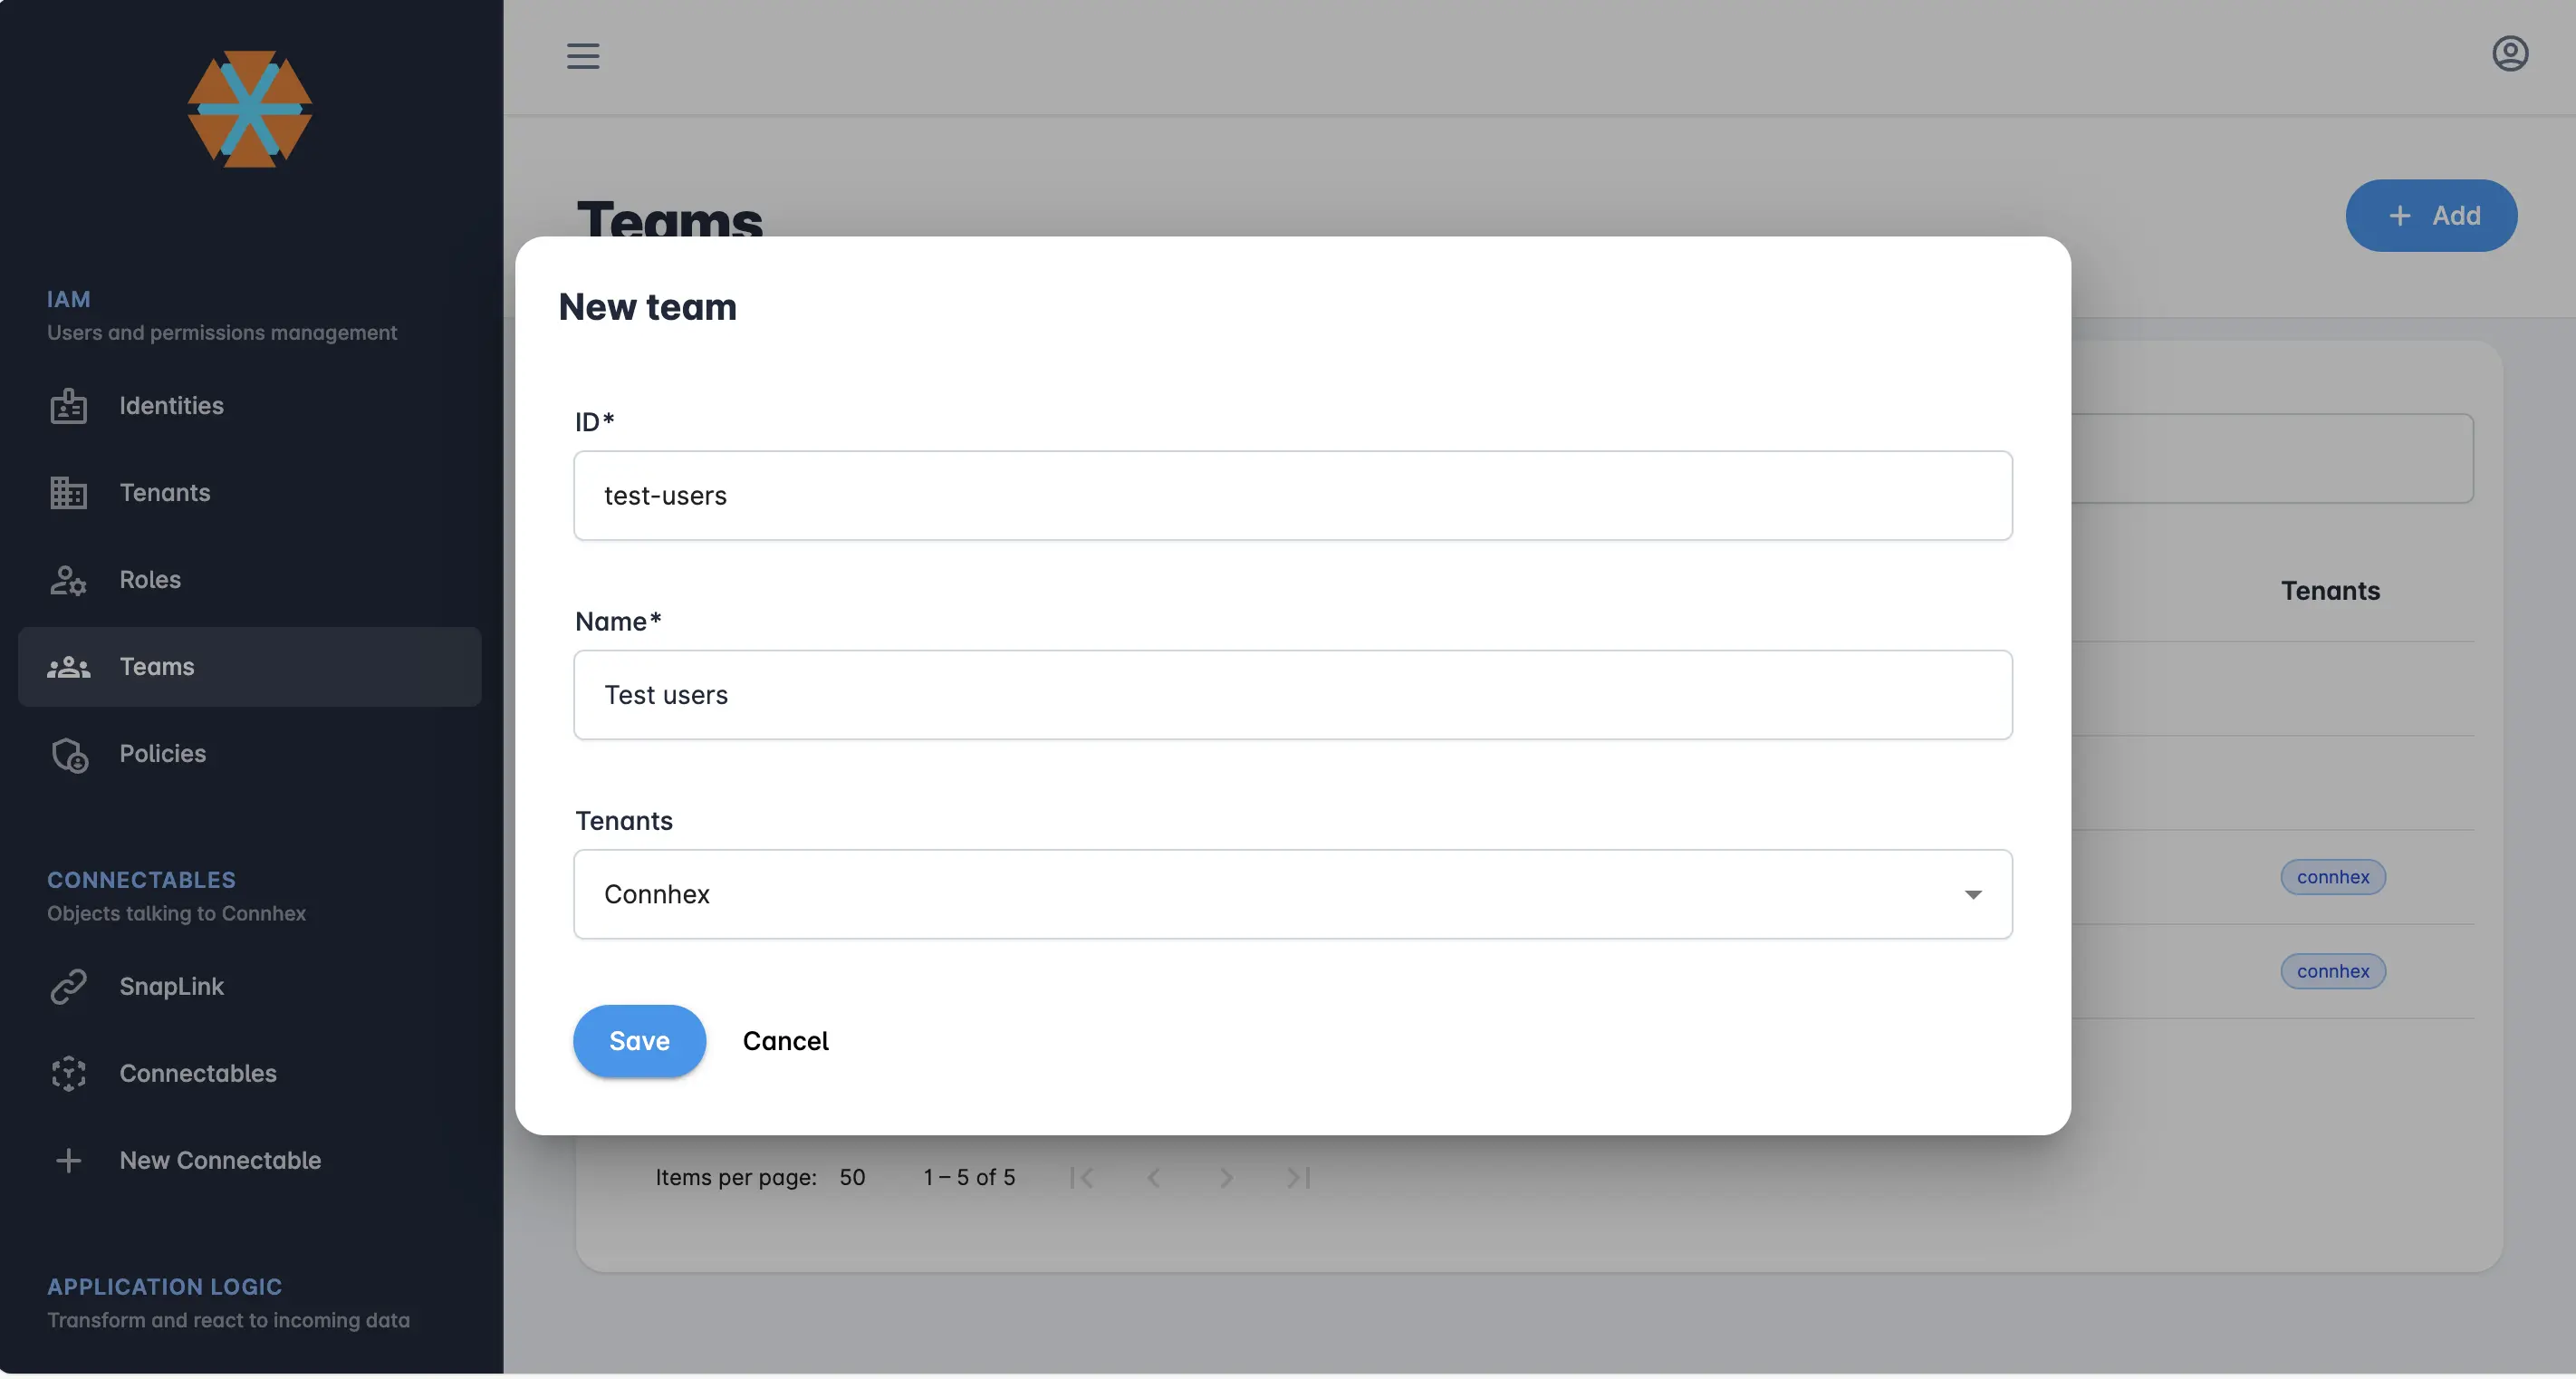
Creating your first team
A set of users sharing some common characteristics can be grouped together into a team.
To create a team, login to Connhex Control with an admin account1. Then use the left sidebar menu to access the Teams section and add a new team:
Creating a role
The actions an entity can perform on a resource are expressed by a role. You can create a role in Connhex Control using the corresponding menu from the left sidebar:
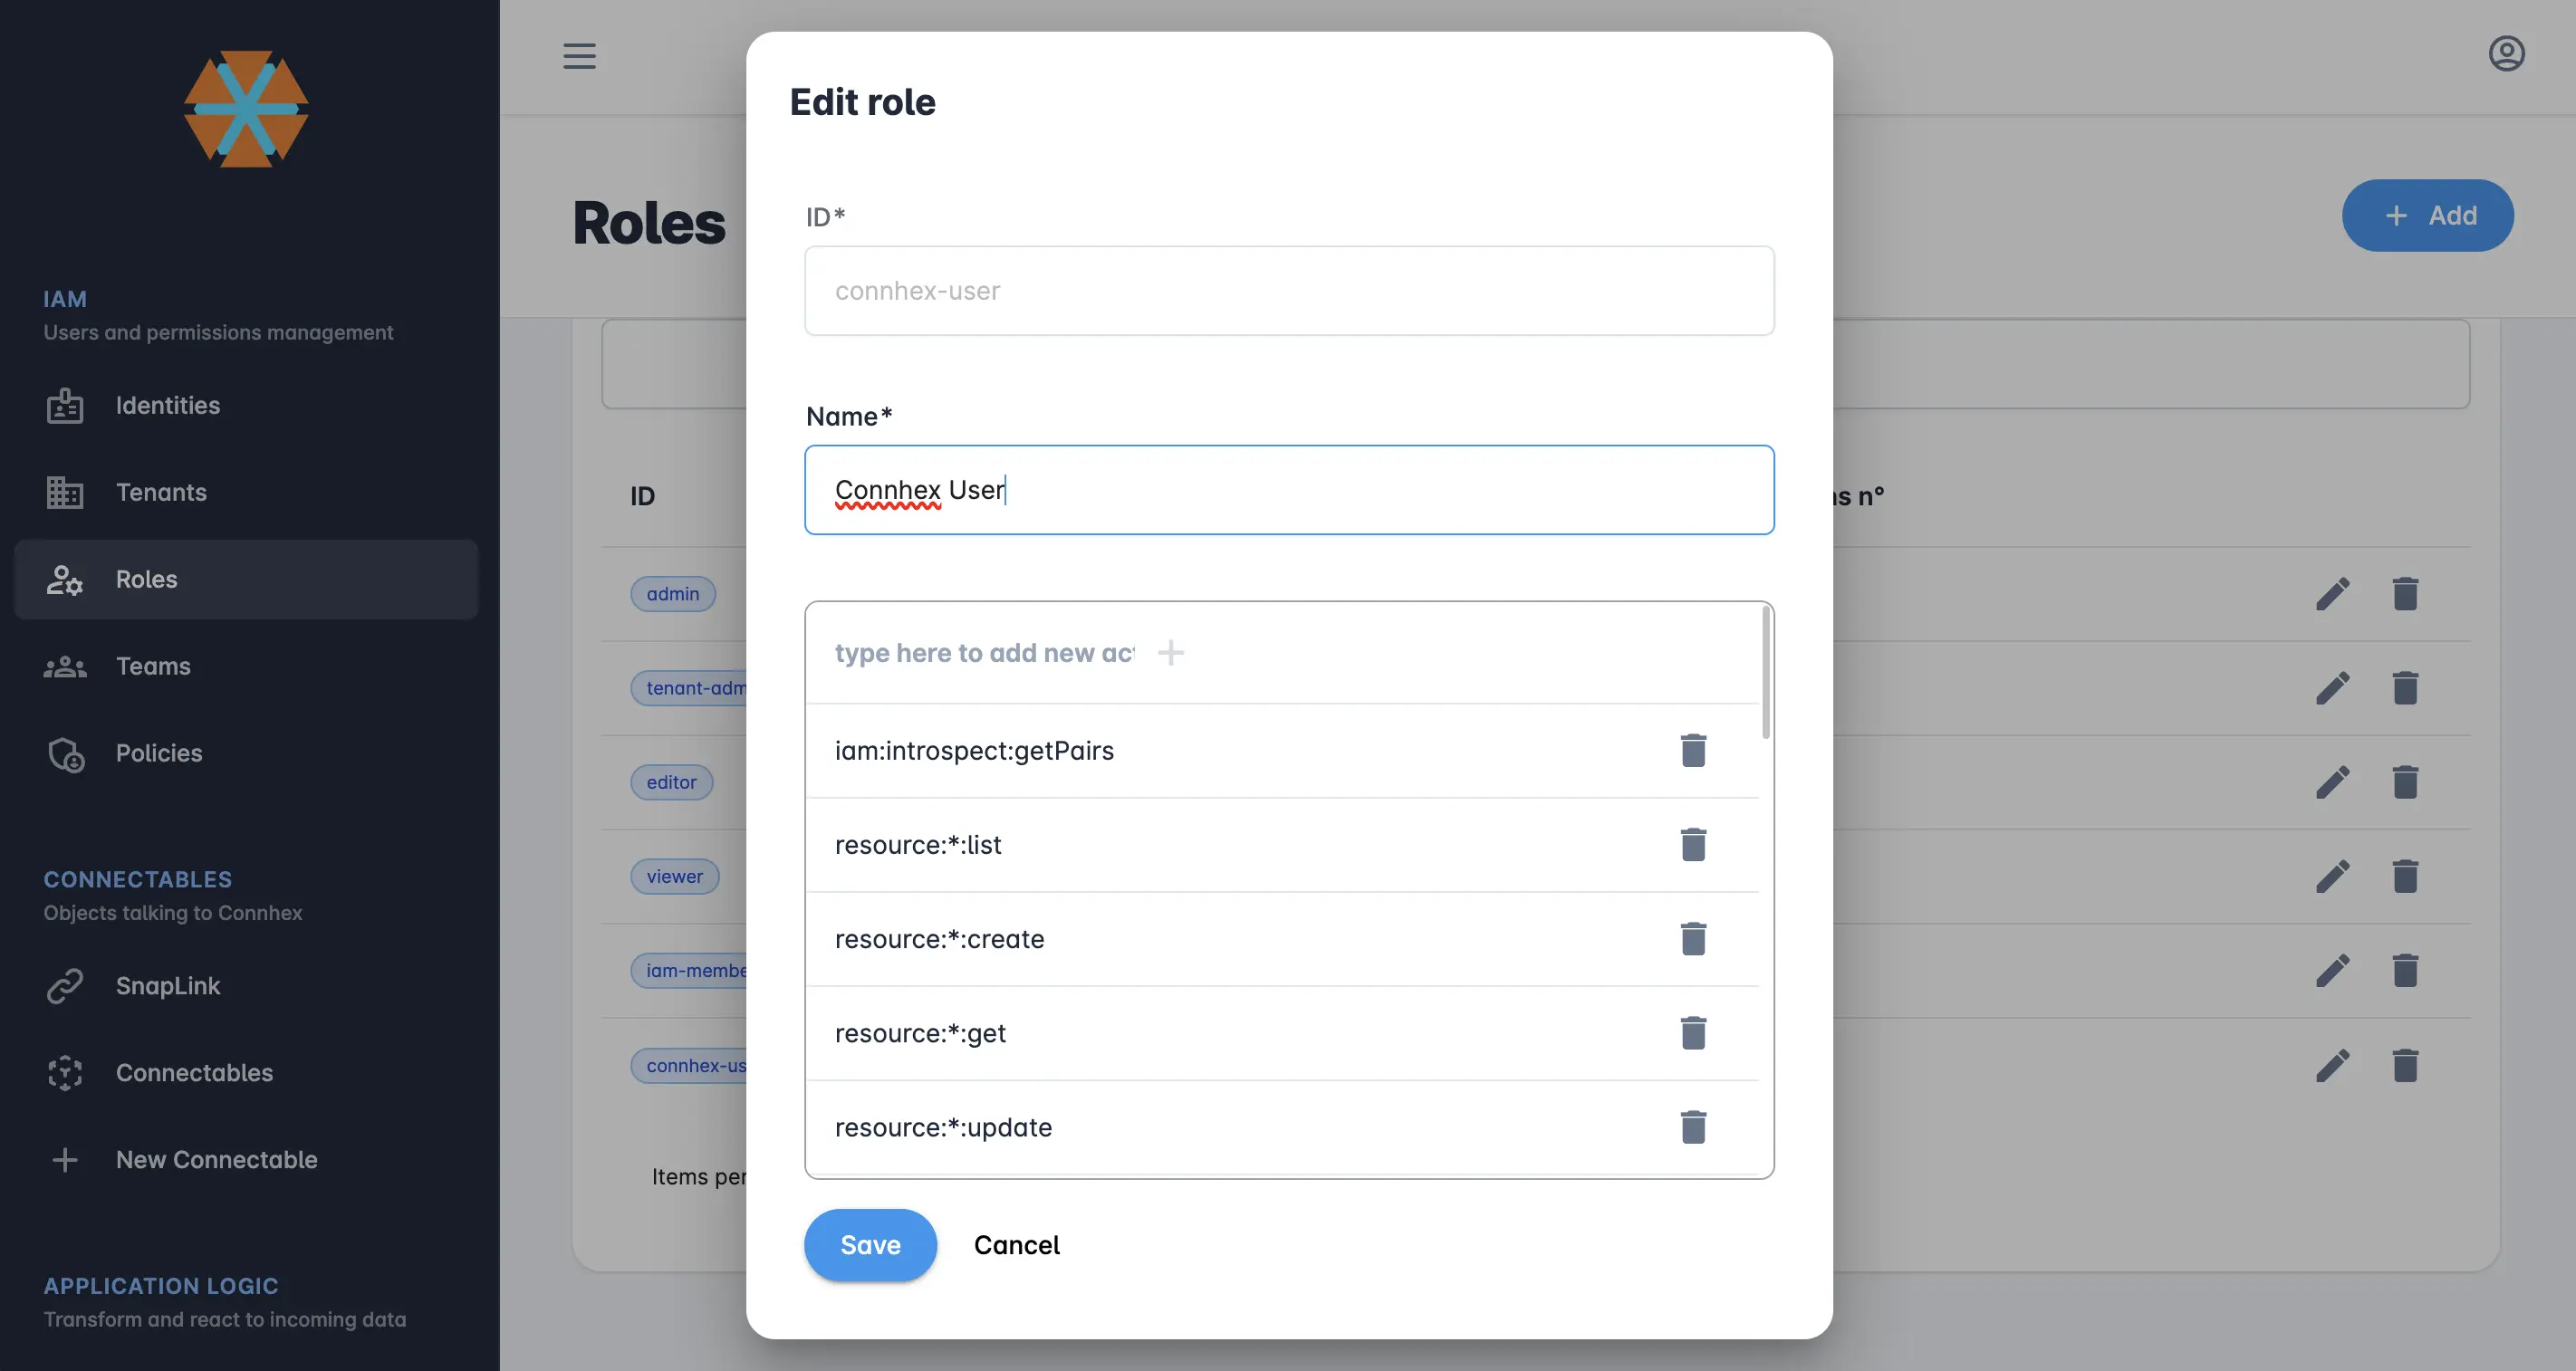
An action is formatted as <resource-type>:<resource>:<action>, for example: core:things:get, or resource:installations:list.
Wildcards (*) are supported too. For example, in order to authorize a user to perform a get action on all resources, you can specify: resource:*:get.
Adding a policy
Once you have successfully created the team and a role, navigate to the policy section and create a policy for the team. You will also need to add a statement to the policy to specify which resources are available to the members of the policy.
The actions that the members are allowed to perform on the policy resources are defined in the role of the statement.
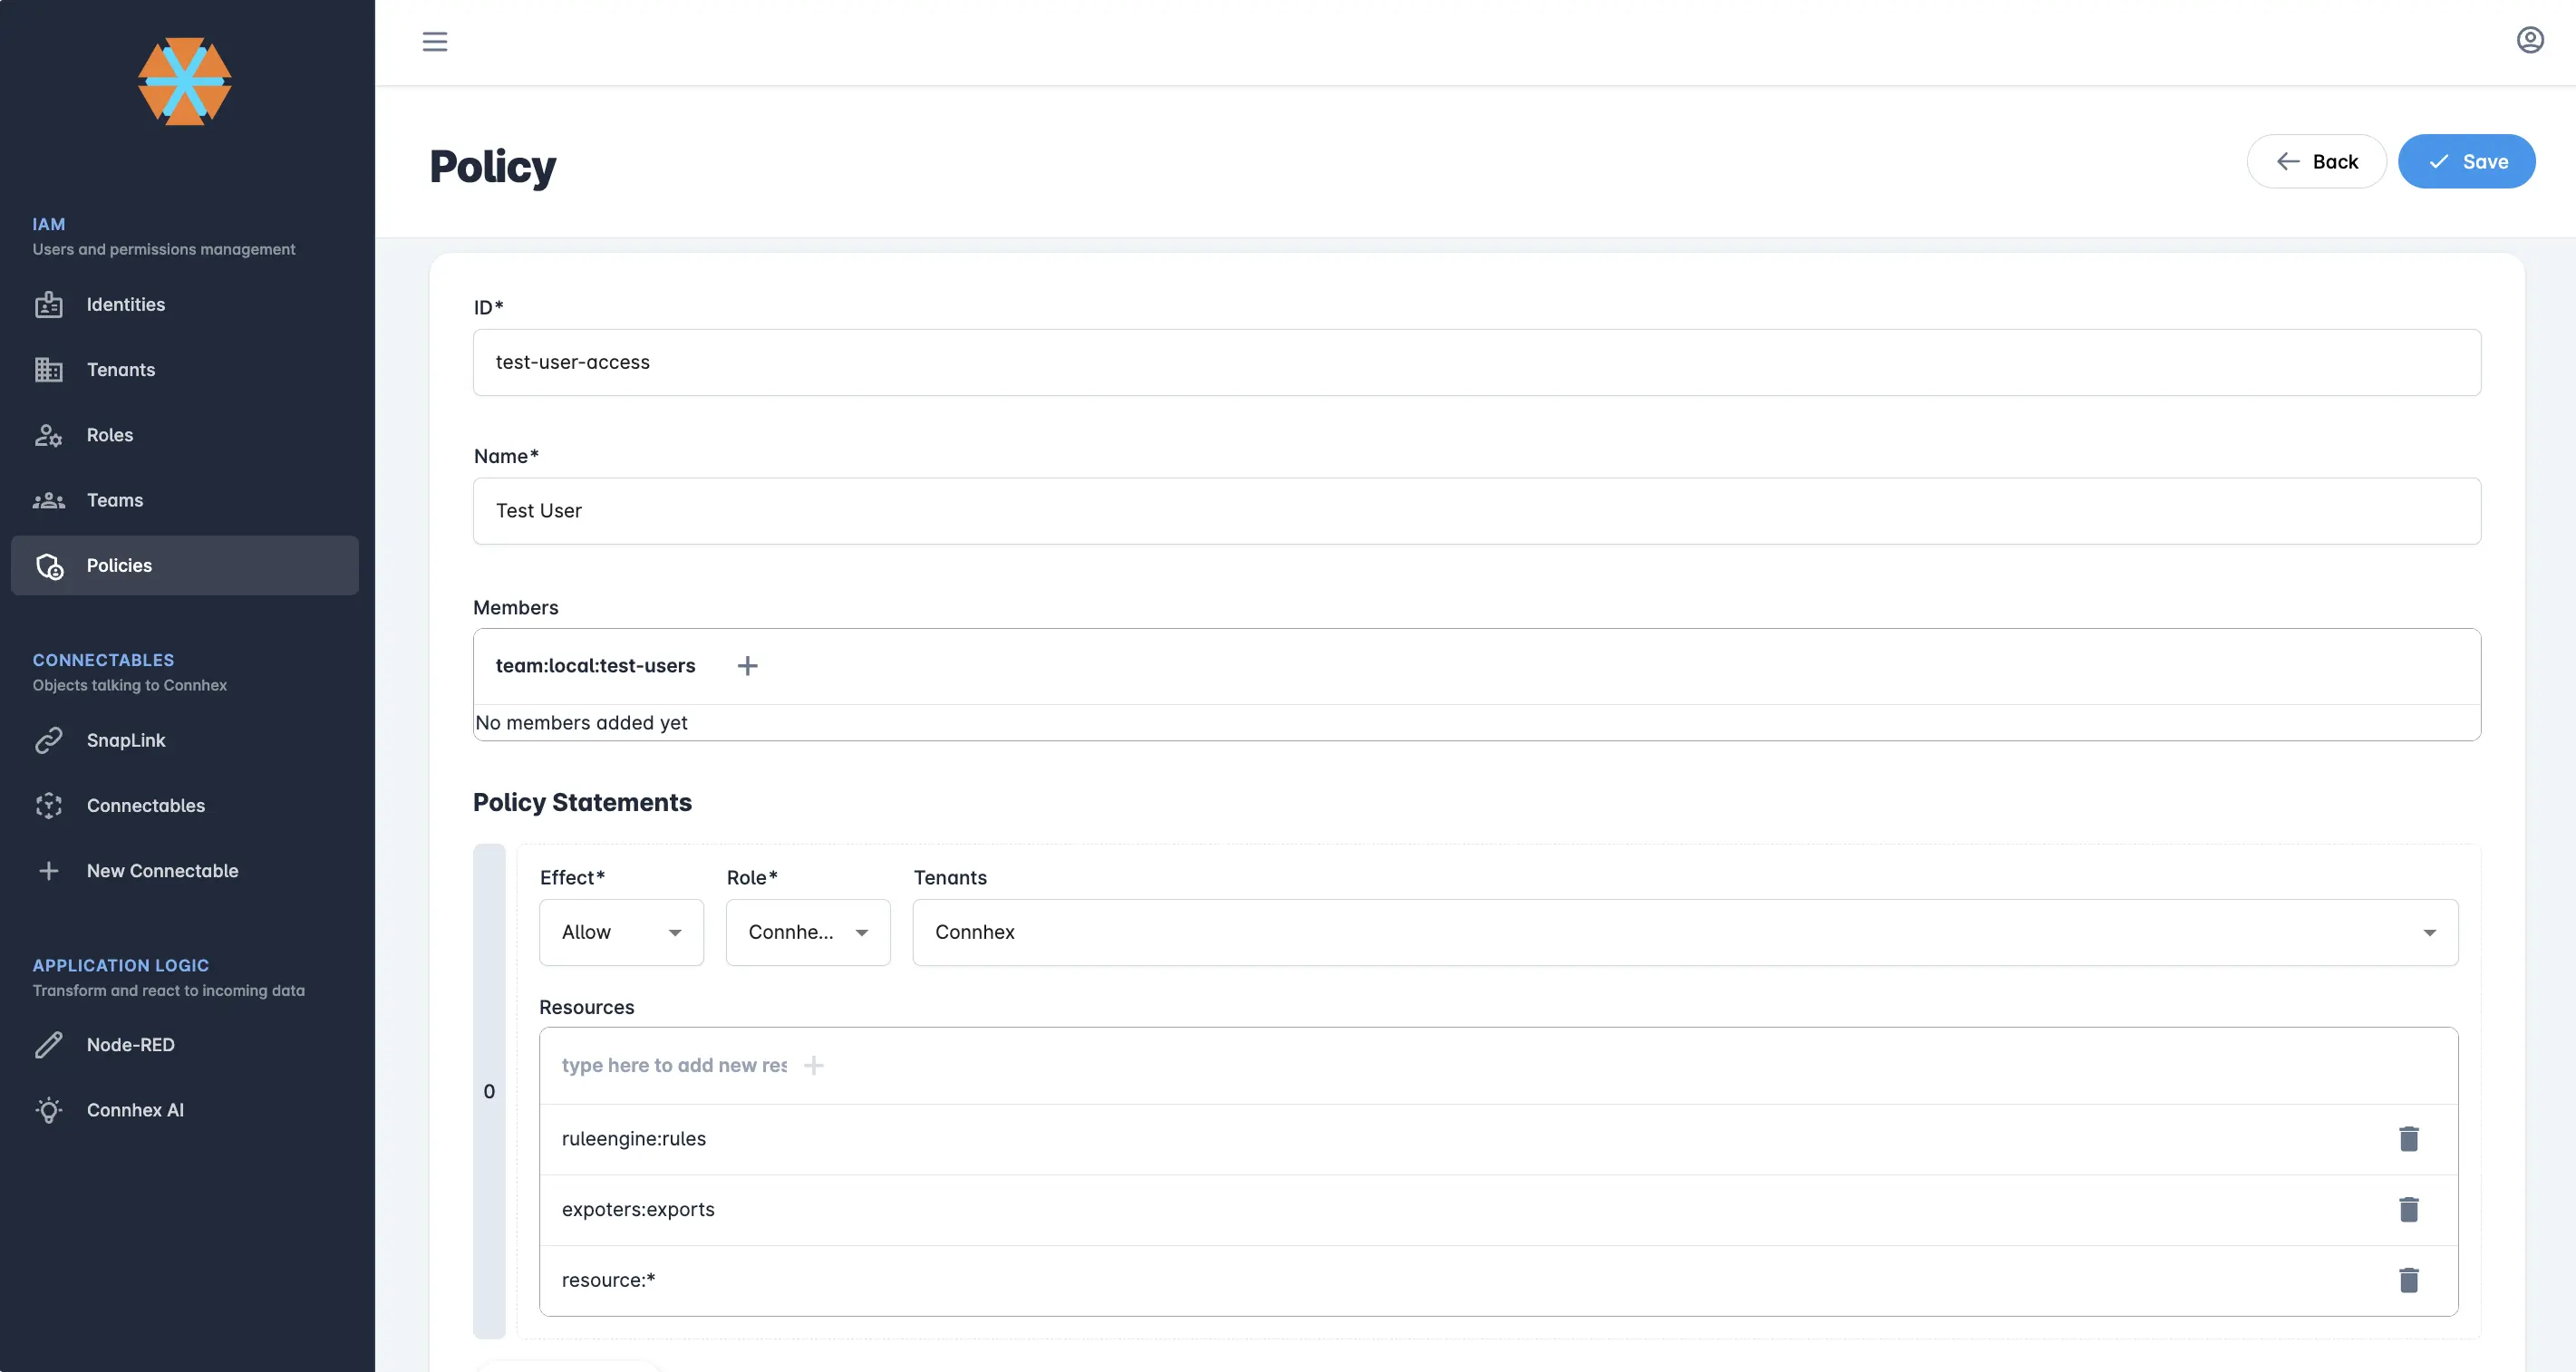
To associate a policy to a team, you must add the team subject to the policy members. The team is identified by the subject team:local:<team-id>.
- This could be the admin account created during the installation, the one we provided or any other admin account.↩